Close Menu
Lindi
  • Home
  • News
  • Moral Story
  • Jokes
  • Life Hacks
  • Health and Fitness
  • Gardening
  • Recipes
  • Quiz
Facebook X (Twitter) Instagram
Lindi
Subscribe
  • Home
  • News
  • Moral Story
  • Jokes
  • Life Hacks
  • Health and Fitness
  • Gardening
  • Recipes
  • Quiz

    There is a hidden men in this picture. Can you find him?

    2025-05-15

    Let’s See How Quickly You Can Find the Differences!

    2025-05-15

    The Needle in the Haystack Challenge: A Visual Test for Sharp Minds…

    2025-05-15

    Think You Have Sharp Eyes? Prove It in This Spot-the-Difference Challenge!

    2025-05-14

    Solving a math puzzle provides numerous benefits…

    2025-05-14
Lindi
Home»Life Hacks»Don’t Rush to Toss Those Shoes! A Cobbler Reveals a Smart Trick to Repair a Damaged Sole at Home…
Life Hacks

Don’t Rush to Toss Those Shoes! A Cobbler Reveals a Smart Trick to Repair a Damaged Sole at Home…

Tech ZoneBy Tech Zone2025-02-212 Mins Read
Share
Facebook Pinterest Reddit Telegram Copy Link

Many people encounter the frustrating problem of cracked or detached soles, which leads them to either invest in costly repairs or discard their beloved footwear.

However, there’s no need to rush to the cobbler or buy a new pair—there’s a simple DIY solution that can save you money and extend the life of your shoes.

Step 1: Apply the Adhesive

Start by applying the adhesive to the damaged area of the sole, stopping about 5 mm from the upper edge. Firmly press the cracked section together to ensure a solid bond.
The glue sets quickly, so hold it in place for a few minutes before letting the shoes sit undisturbed for about 30-40 minutes to allow the adhesive to cure fully.

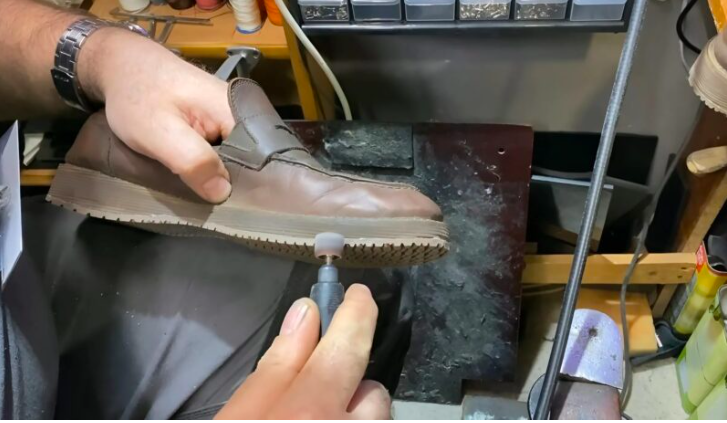
Step 2: Prepare the Sole for Reinforcement

Once the adhesive has dried, use sandpaper to smooth the sole’s surface. This step is crucial for achieving better adhesion when you attach the reinforcement pad.
Lightly sand both the sole and the pad to create a rough texture, enhancing the bond between the materials.

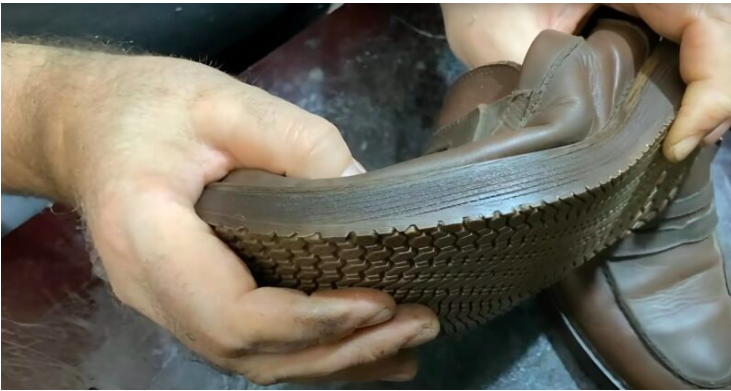
Step 3: Attach the Reinforcement Pad

Apply a thin layer of adhesive on both the sole and the reinforcement pad. Allow the glue to set for around 40 minutes, then add a second coat and wait an additional 20 minutes.
For optimal adhesion, apply heat—ideally around 50-60°C—to activate the adhesive. A heat gun or high-powered hairdryer can be effective for this step.

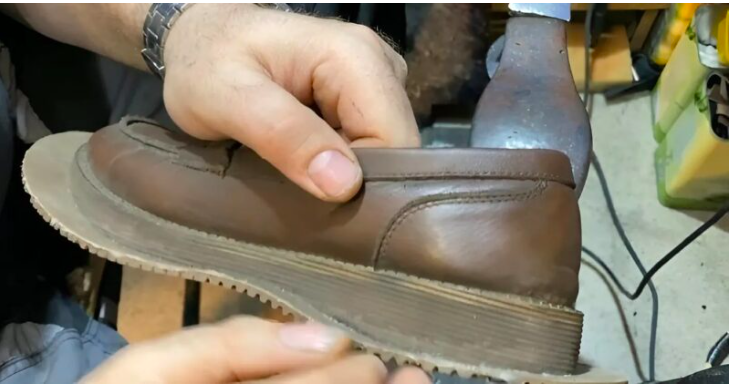
Step 4: Final Touches

After securing the pad to the sole, let the shoes rest for at least 4 hours to ensure the bond sets properly. Once fully dry, trim any excess material from the reinforcement pad and sand down the edges for a clean, professional nish.

The Outcome? Shoes That Feel Like New and Last for Years!

By following this simple repair method, your shoes can remain in great shape for many more years, saving you money and reducing waste. Instead of tossing out perfectly good footwear, try this easy x and give your shoes a new lease on life!

#hometips #lifehacks lifehacks
Share. Facebook Pinterest Reddit Telegram Copy Link

Related Post

Grandma’s remedy to eliminate phlegm and unclog the airways

Ready to supercharge your garden without spending a dime?

Why You Should Eat More Ripe Papaya, Especially in the Morning…

11 Silent Signs Your Body Gives Before Diabetes Strikes…

Most people miss this. 10 warning signs saying your arteries are clogged…

Eliminate bad breath: If you have this in your mouth, you could have these bacteria…

Unique perfumes, perfect for the most sophisticated and elegant…

2 times you should absolutely not eat bananas…

This is the Kamitetep, a Species of Moth (Phereoca Uterella ) that Clings to the Walls of the House

Son Puts Mother in Nursing Home, Returns Home and Finds His Suitcases on the Doorstep — Story of the Day

2025-05-17

My sister d!ed right in my arms while giving birth. The kids’ dad? A no-show. I didn’t even have a clue what he looked like, but I knew for sure those triplets meant nothing to him!

2025-05-16

Understanding and managing those painful red bumps

2025-05-16

Hoda Kotb Officially Announces Her Upcoming Wedding in 2025 And the Groom’s ‘Surprising Identity’!

2025-05-16

5 Alarming Stroke Warning Signs to Watch for in Young People

2025-05-16
Copyright © 2024. Designed by Lindi.
  • Home
  • Privacy Policy
  • Disclaimer

Type above and press Enter to search. Press Esc to cancel.